4. Opera House
Task: /
Gaming Time: 1 hour
Finds: 3 Secrets, 1 Weapon (Automatic Pistols)
1st Switch
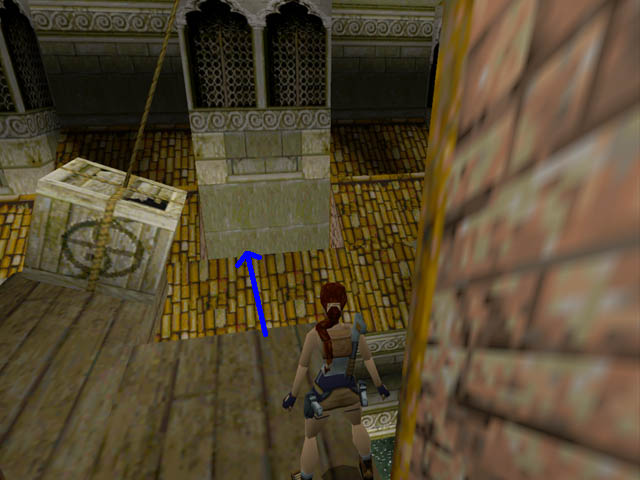
From the start go to the left, beware of the swinging crate. Make a running jump towards the next platform on the left. Grab the ledge and pull up. (If you want to, turn around and shoot the killer.) Jump to the stone platform on the other side of the river. (If Lara drops into the water, swim towards the ladder and climb up.) Climb one level down and activate the switch.Goodies:
Get down into the water and search the jetty to find some automatic ammo left by the killer. If you don't have them you will find Automatic Pistols. Swim back and climb up the ladder.
Climb up again and jump back over the river.
The Ornate Key
Way to the Roof
Leave the crate on your left and jump onto the roof. Turn right, jump back and grab the ledge. Shimmy to the left. Let go of the ledge when you're above the next roof. Again shimmy to the left till you're above the opening. Let go and grab the ledge below. Pull yourself up. Shoot the window. Lara can walk through the broken glass. (Don't run!!) Climb up the ladder in the left corner. Use the key at the end of the pathway. Follow the path and climb up the ladder on the right. On the wall position yourself in the middle and take a running jump towards the wooden plank. Continue running. Jump again at the end. Grab the ledge and pull yourself up. Go to the right and climb into the opening. Draw weapons and follow the way towards the right.The Roof of the Opera
Wait at the ledge. Shoot the killer on the roof. He loses some ammo. Jump down and kill two dogs and a brawler. Pick up the large medi pack. In the corner Lara can pull herself up onto the roof. Draw weapons and shoot the two killers on the opposite side. Collect the medi pack and the ammo. Climb back onto the roof near the swinging crate. Make a running jump towards the ledge under the swinging crate. (Face a bit to the left. Start running when the crate starts swinging towards you.) Drop into the hole. Use the switch. Climb out again. Shoot the brawler and the killer. Pick up flares and ammo.The Stage
Jump through the open trapdoor. Use the left trigger and climb down the ladder. Run down the slope. Hurry towards the left and climb into the alcove to avoid some boulders. Then activate the trigger and climb up the ladder again. Climb into the alcove on the left. Jump down on the other side. Shoot the killer coming from the left. He loses a medi pack. (Careful don't stand under the sandbags!!!!) Run to the right. Shoot the killer and the dog. Further on the right climb down carefully. Shoot the brawler and the dogs. In the middle behind the pool you will trigger some boulders. (Do it on purpose to be sure. Run towards the other side.) Shoot the killer on the stage. Swim towards the stage. Collect the ammo.Under the Stage
Go into the room on the left and activate the switch. Then go to the room on the right and shoot the two brawlers. Collect the medi pack. Run a round in the room to trigger all sandbags. (Don't stop moving.) Get back into the door frame. (Witch your back towards the stage.) Jump up to reach the wooden plank. Pull yourself up and go towards the drawbridge. Turn left. Make a running jump towards the gap. Shimmy to the left. Pull yourself up and use the button to lower the drawbridge. Jump back to the wooden plank. Cross the bridge and run towards the end. Turn to the left and make a running jump, then pull yourself into the alcove. Climb higher up and turn around. Make a running jump to reach a higher ledge. Pull yourself up and kill the rats. Go to the left. Jump towards the next plank when the sandbag swings away. Jump onto the last plank at the wall. (Stay on the right side.) Pull the switch. Continue to the right. Slide backwards down the slope. Hold on to the edge at the end. Pull yourself up and jump backwards. (Lara drops through the open trapdoor in the stage.)1. Relay (Lift)
Swim straight on. Turn left twice. Dive into the opening. Use the switch on the left.Secret 1 (Silver Dragon):
Dive into the gap opposite and collect the Silver Dragon.
Swim back into the upper tunnel, where you came in. This time dive through the hole straight on. On the other side pull yourself up onto the stone platform. Pick up the Relay Box. Climb up the ladder. At the top do a standing jump and pull yourself up onto the next level. Go to the right. Run into the passage on the left, where the killer was at the beginning. Run to the right. Shoot the two dogs. Use the relay on the right wall. Activate the trigger further on the right side.
Secret 2 (Gold Dragon):
Send the lift down. Jump onto the roof and climb up the ladder on the right. Walk into the room and through the splinters. Pick up the Gold Dragon. Pull the switch in the first alcove. Pick up the ammo in the second. Leave the room. Go around the corner to the right, back to the lift. Call it by using the trigger, and then push the trigger again to take it down.
Lift/2. Relay
Jump into the lift. Leave it downstairs and shoot the two killers. They lose Ammo. Use the switch. (The lift goes back up again.) Jump into the water under the lift. Dive to the left. Collect the relay. Leave the room. Dive towards the panel on the right. Pull the trigger. Dive through the open gate on the right. Swim towards the surface and climb out. (Beware of the rats.) Turn around. Go towards the ledge. Do a standing jump to grab the next ledge. Pull yourself up. Turn around. Draw weapons and shoot the killer on higher level. Again from the ledge do a standing jump. Kill the rats. Walk to the right. Shoot the dog. Follow the tunnel and shoot the window.Dressing Room & Ventilation Shaft
Drop backwards into the dressing room. Use the switch. Slide down the passage. Jump shortly before you reach the ventilator. Grab the ledge, pull yourself up and pick up the Ornate Key. Climb up to the right. Turn around and do a somersault to the left. Jump while sliding down. Kill the rats. Go towards the ledge. Do an standing jump. Stand with your back on the left wall, as far at the outer edge as possible and do a sideflip to the left. Repeat this one level higher.Secret 3 (Jade Dragon):
Turn around and make a standing jump to reach the ledge. Carefully walk forwards. Pick up the Jade Dragon and get out again.
Pull the crate once. Then pull it to the left. Use the trigger which was hidden behind the crate. Push the crate through the open door 4 times, till you reach the little higher platform. Shoot the window on the right. Climb up and push and pull the crate there to get it on top of the other one. Step onto the elevation and jump up to grab the top ledge of the crates. Climb up.
Under the Roof again
Climb onto the wall on the left. Shoot the brawler. Follow the passage to the left. Turn right. Go into the last alcove on the left. (Where Lara climbed up earlier on.) Do a standing jump from the ledge to reach the higher one. Pull yourself up and shoot the killer. He loses ammo. Turn right. Use the key to open the door. Jump through the open door. (Shoot the killer on a lower level, behind Lara.) Run into the passage and use the switch again. Climb up and use the relay. Now use the right trigger and climb down again.Back on Stage
Climb through the door, back into the opera. Swim towards the stage. Climb up. Shoot the killer. Collect the ammo. (Don't drop into the hole in the stage.) Now run through the door at the back of the stage. Some people keep asking for this door. It's only there when you have been back under the roof and placed the relay there. The appearance of the stage will then change. Be careful, there are two brawlers and a dog lurking here. One loses a medi pack. Climb over the boxes on the left. Climb down again to the right, this is where the lamp is. Pull the box twice. Climb over it and use the switch in the chamber behind. Climb back up again, where the lamp is. Climb into the opening and follow the path to the right and into the next opening. Jump over the hole in the floor into the window. Jump onto the slope on the left, so Lara slides down in front of the swinging sandbag. Then run past the bag at the right moment. Draw weapons and if necessary use a medi pack.Badguy
Jump down into the room. Start fighting the baddy and the two dogs. (Fill up your energy. The big baddy loses a lot of ammo and the grenade launcher, if you don't have it already.) Run to the far end of the room and shoot the killer waiting here. This will get you another medi pack and some ammo. Climb onto the little crate in the passage with the lamp. Climb up to the left. Turn left. Jump to the next box, the one with the swinging crate. (Stay on the left side of the stack.) Get past the second crate. Proceed to the stack on the right and from there continue to the left. (Near the place where Lara entered the room.) Use the switch. Jump down again and shoot the next killer. Pick up the ammo. Run to the far end of the room again and enter the open door on the right to get to the plane.© www.tombraidergirl.com Personal use only, no reproduction. Last changes: 20 Mar 2024, 02:51


It's always best to avoid being skewered.